Published Date -

Modernize Microsoft Power Pages with OOTB Styles and Custom Styles: A Step-by-Step Guide

Microsoft Power Pages is a low-code/no-code website builder that allows you to create and manage websites without writing any code. It comes with a variety of pre-built themes and templates, but you can also apply your custom styling to create a unique look and feel for your website.
There are two ways to apply custom styling in Power Pages
1. Use the Styling workspace: The Styling workspace in Power Pages allows you to make custom CSS changes to individual elements on your pages. You can change the font, color, size, and other properties of any element on your page.
2. Upload a CSS file: You can create a CSS file in your favourite code editor and then upload it to Power Pages. Once you have uploaded the CSS file, it will be applied to all pages on your website.
Way - 1: To use the Styling Workspace
1. Begin by accessing Power Pages and choosing the specific site where you intend to apply custom CSS.
2. Click on the Edit button to enter the site's editing mode.

3. Within the left-hand panel, locate and select the Styling option.

4. Now pick the element on your page that you wish to style.
5. In the Properties pane, make the desired CSS adjustments. You can customize the element in various aspects, such as.
- Theme: Change the theme by selecting the desired theme and clicking Save.

- Fonts: Modify font-related attributes, including font family, font weight, font size, and font color for different headings.

- Button: Tailor button properties, such as style, button radius, background color, and more.
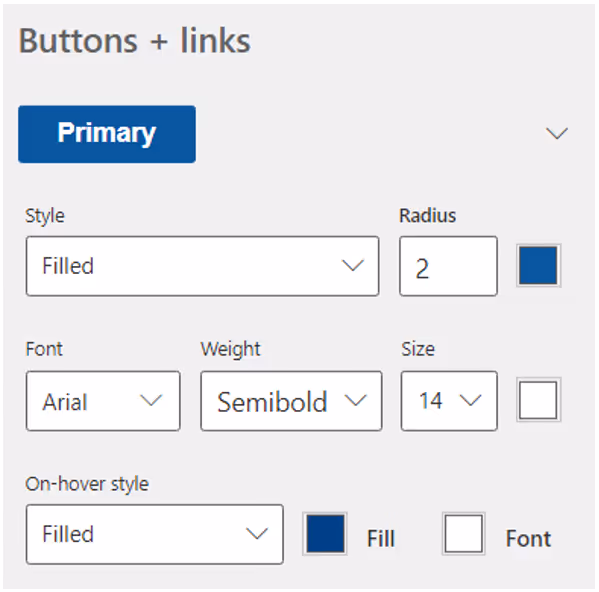
- Hyperlink: Adjust link properties, such as the presence of an underline, font style, link text color, hover color, and more.

6. After achieving the desired styling, save the changes.

7. To apply the updated CSS and view the alterations, select Sync.
Way - 2: To upload a CSS file
1. Start by navigating to Power Pages and selecting the specific site where you wish to apply custom CSS.
2. Click on the Edit button to enter the site's editing mode.
3. In the left-hand panel, locate and choose the Styling option.

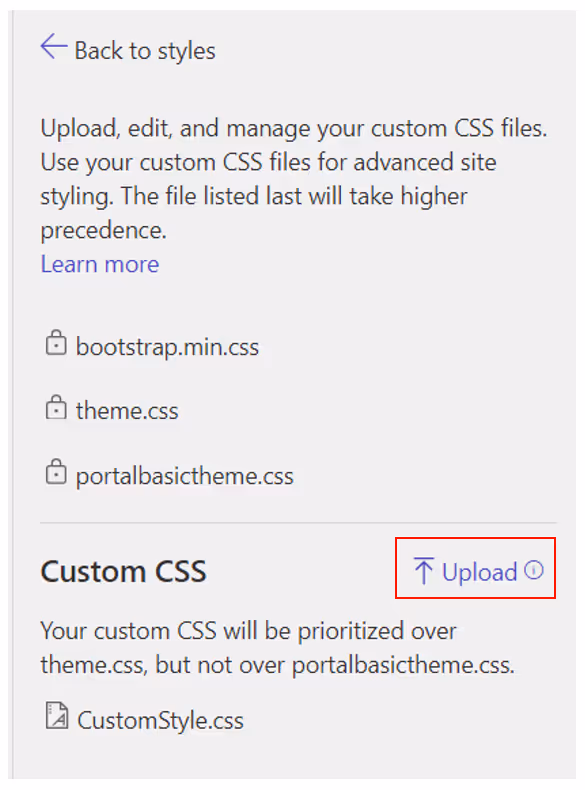
4. Within the More options menu, click on Manage CSS.

5. In the Custom CSS section, select Upload, and then proceed to pick the CSS file that you want to upload.
Here is an example of how to apply custom styling to a button in Power Pages
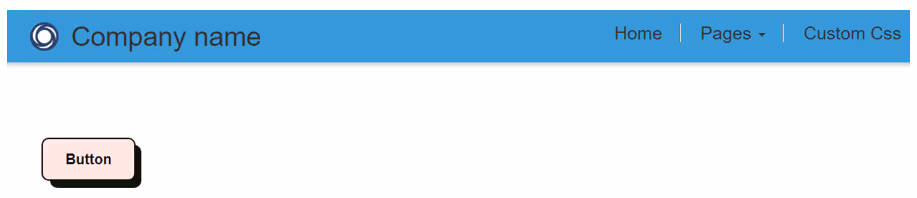
1. Begin by creating a new page and adding the Button component to it.


2. To apply custom styling, go to the page you've created and select Edit. This will open Visual Studio Code for editing.


3. Assign a custom class name, such as 'customstyleBtn', to the button element.

4. Navigate to the 'web-files' section and locate your 'CustomStyle.css' file.

5. Add your custom CSS rules to style the button according to your preferences.

6. Once you've made your CSS modifications, save the file by pressing 'Ctrl+S' (or the equivalent shortcut for your system). Then, return to your Power Pages site and click on Sync.

7. To preview the changes on your site, click Preview and select the Desktop option.

8. You'll see the final result, showcasing the custom styling applied to the button.
Conclusion
You can use CSS to style any element on your Power Pages page, including buttons, text, images, and layouts. By using custom CSS, you can create a unique and professional look and feel for your website.
Ready to give your Power Pages website a personalized touch? Start applying custom styling today and unlock endless design possibilities. Get creative and make your website stand out! If you have any questions or need assistance, feel free to reach out -> Contact us. Your unique web design journey begins here.
faqs

Subalakshmi
Subalakshmi is a SharePoint Developer with over 4 years of experience delivering enterprise Microsoft 365 solutions, specializing in SharePoint Online, Microsoft Teams, Azure AD, and Power Pages. She is known for building secure, scalable digital workplace solutions and translating complex business requirements into efficient, high-impact implementations


.svg)